Outils pour utilisateurs
Panneau latéral
raspberry:installation (lu 15556 fois)
Ceci est une ancienne révision du document !
Table des matières
Raspbian Lite + Witty
Préparation
Pour installer Raspbian lite sur la carte µSD, nous allons utiliser un logiciel prêt à l’emploi fonctionnant sous windows, mac et linux
— source: https://raspberry-pi.fr/creer-carte-sd-windows-mac-linux-raspberry-pi-imager/
Pour Windows ⇒ https://downloads.raspberrypi.org/imager/imager.exe
Pour Linux ⇒ https://downloads.raspberrypi.org/imager/imager_amd64.deb
Après avoir lancer l’appli, cliquez sur “Choose OS” puis “Raspberry Pi OS (other)” puis “Raspberry Pi OS Lite (32-bit)”
Ensuite, cliquez sur “Choose SD Card” puis sur votre carte SD dans la liste.
Enfin cliquez sur “Write”
Dans mon cas, j’ai eu une erreur disant que la carte sd était défectueuse. J’ai utilisé la méthode en ligne de commande qui n’a pas posé de problème…
$ sudo dd bs=1M if=2021-01-11-raspios-buster-armhf-lite.img of=/dev/sdb status=progress conv=fsync
1858076672 bytes (1,9 GB, 1,7 GiB) copied, 162 s, 11,5 MB/s
1776+0 enregistrements lus
1776+0 enregistrements écrits
1862270976 bytes (1,9 GB, 1,7 GiB) copied, 193,276 s, 9,6 MB/s
Pré-configuration
Avant d’insérer la µSD dans le raspberry, on va pouvoir activer ssh et configurer le wifi afin d’éviter de brancher un écran/clavier/souris
— doc: https://raspberry-pi.fr/raspberry-pi-sans-ecran-sans-clavier/
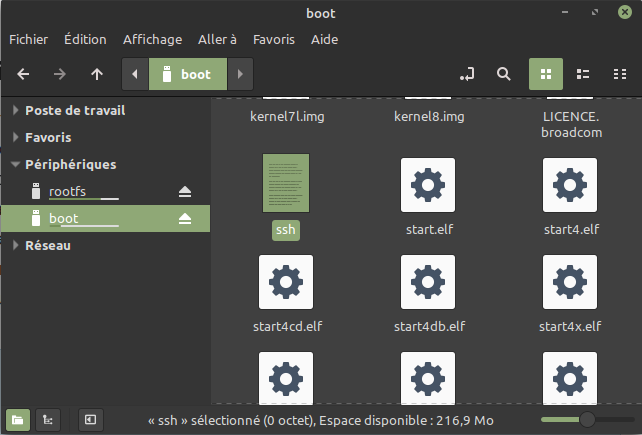
Créer un fichier ssh vide dans la partition boot
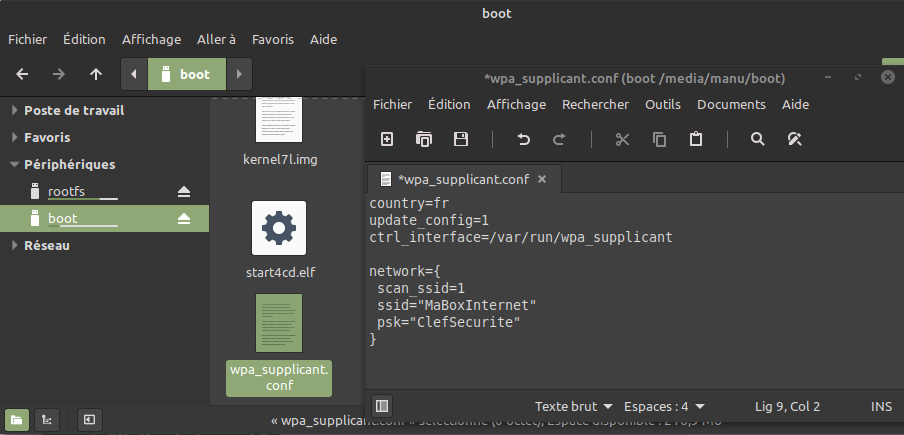
Et pour le wifi, créer un fichier wpa_supplicant.conf dans la partition boot avec le contenu suivant
country=fr
update_config=1
ctrl_interface=/var/run/wpa_supplicant

network={
 scan_ssid=1
 ssid="MaBoxInternet"
 psk="ClefSecurite"
}
Connexion au raspberry en ssh
Sous Windows, j’utilise Git-Bash qui permet d’avoir un terminal propre ( https://git-scm.com/download/windows )
Retrouvez l’adresse ip local de votre raspberry en consultant votre box ou votre routeur wifi puis connectez vous avec l’utilisateur pi et le mot de passe par défaut raspberry
$ ssh pi@192.168.0.39
The authenticity of host '192.168.0.39 (192.168.0.39)' can't be established.
ECDSA key fingerprint is SHA256:beQ1vm0+YVZwQi2hnXZvESxk7UJ7iQaTKkjiz/0KB6o.
Are you sure you want to continue connecting (yes/no)? yes
Warning: Permanently added '192.168.0.39' (ECDSA) to the list of known hosts.
pi@192.168.0.39's password:
Linux raspberrypi 5.4.83-v7+ #1379 SMP Mon Dec 14 13:08:57 GMT 2020 armv7l

The programs included with the Debian GNU/Linux system are free software;
the exact distribution terms for each program are described in the
individual files in /usr/share/doc/*/copyright.

Debian GNU/Linux comes with ABSOLUTELY NO WARRANTY, to the extent
permitted by applicable law.

SSH is enabled and the default password for the 'pi' user has not been changed.
This is a security risk - please login as the 'pi' user and type 'passwd' to set a new password.
Un message invite à vivement changer le mot de passe par défaut avec la commande passwd.
Avec la commande suivante, on constate bien que tout l’espace de la carte sd a été pris en compte (15G)
pi@raspberrypi:~ $ df -h
Filesystem      Size  Used Avail Use% Mounted on
/dev/root        15G  1.3G   13G   9% /
devtmpfs        183M     0  183M   0% /dev
tmpfs           215M     0  215M   0% /dev/shm
tmpfs           215M  5.8M  210M   3% /run
tmpfs           5.0M  4.0K  5.0M   1% /run/lock
tmpfs           215M     0  215M   0% /sys/fs/cgroup
/dev/mmcblk0p1  253M   46M  207M  18% /boot
tmpfs            43M     0   43M   0% /run/user/1000
Installation du Witty
Attention, l’alimentation se fait directement sur la carte Witty en USB Type C
— Doc : http://www.uugear.com/doc/WittyPi3Rev2_UserManual.pdf
Par défaut le raspberry n’est pas alimenté, il faut appuyer sur le bouton du witty pour l’alimenter.
Installation du soft
pi@raspberrypi~ $ wget http://www.uugear.com/repo/WittyPi3/install.sh
pi@raspberrypi~ $ sudo sh install.sh
================================================================================
|                                                                              |
|                   Witty Pi Software Installation Script                      |
|                                                                              |
================================================================================
>>> Enable I2C
File raspi-blacklist.conf does not exist, skip this step.
>>> Install i2c-tools
...
>>> All done. Please reboot your Pi to have UWI server running :-)
With default settings, the web interface URL is http://raspberrypi:8000/

>>> All done. Please reboot your Pi :-)
Rebootez
sudo reboot
Le soft se trouve dans wittypi/wittyPi.sh
pi@raspberrypi:~ $ cd wittypi/
pi@raspberrypi:~/wittypi $ ./wittyPi.sh
================================================================================
|                                                                              |
|   Witty Pi - Realtime Clock + Power Management for Raspberry Pi              |
|                                                                              |
|                   < Version 3.13 >     by UUGear s.r.o.                      |
|                                                                              |
================================================================================
>>> Current temperature: 28.75°C / 83.75°F
>>> Your system time is: Fri 19 Feb 2021 20:42:33 GMT
>>> Your RTC time is:    Fri 19 Feb 2021 20:42:34 GMT
>>> Vout=4.97V, Iout=0.21A
Now you can:
  1. Write system time to RTC
  2. Write RTC time to system
  3. Synchronize time
  4. Schedule next shutdown
  5. Schedule next startup
  6. Choose schedule script
  7. Set low voltage threshold
  8. Set recovery voltage threshold
  9. View/change other settings...
 10. Reset data...
 11. Exit
What do you want to do? (1~11) 11
On peut y voir la température de la carte, le voltage, l’intensité, l’heure du système et l’heure de la carte.
Vous pouvez aussi accéder à une interface web ⇒ http:{ip.de.votre.raspberry}:8000 qui présente l’état du GPIO mais qui semble un peu buggué..
raspberry/installation.1613767624.txt.gz · Dernière modification : de edmc73